ใน ep นี้ เราจะสอน ขั้นตอนการสร้างแอพพลิเคชั่น AI ที่มีความสามารถ Image Classification แบบ Multi-class Classification จำแนกรูปภาพ ด้วย TensorFlow Lite โดยใช้โมเดล MobileNet ซึ่งถูก Pre-trained, Quantization และ Convert ไว้เรียบร้อยแล้ว มาประกอบเป็น App สำหรับรันบนมือถือ Android ด้วยภาษา Kotlin
สอนเขียน App AI มือถือ Image Classification บน Android
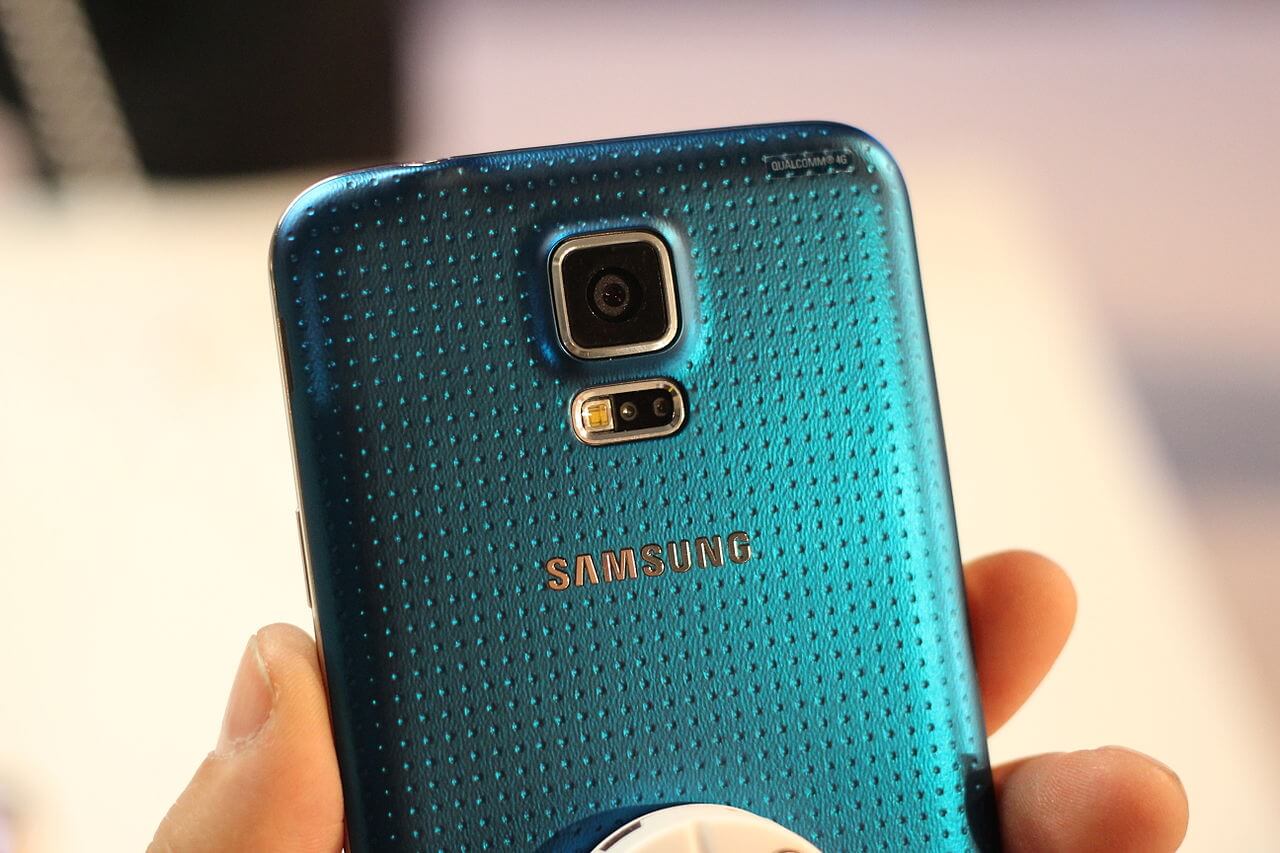
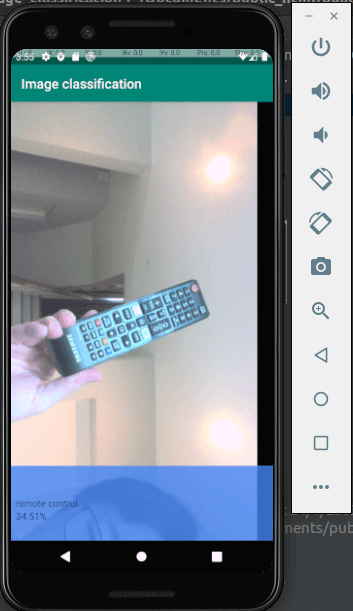
เราสามารถพัฒนา App บนมือถือ Android ให้มีความสามารถด้าน AI / Machine Learning มีฟังก์ชันจำแนกรูปภาพ Image Classification เช่น รูปรีโมท ที่ถ่ายจากกล้องมือถือ
App ได้ predict ว่าเป็น remote control 34.51% Out of the box โดยที่เราไม่ได้ทำ Transfer Learning ใด ๆ เลย ดังตัวอย่างด้านล่าง
ในเคสนี้ เราจะใช้รูปภาพกล้องมือถือ ทำให้โค้ดซับซ้อนยิ่งขึ้น เนื่องจากต้องจัดการเรื่องต่าง ๆ เพิ่มเติม เช่น จัดการกล้อง, นำภาพจากกล้องมาแสดงบน App, แปลงข้อมูลภาพจากกล้อง ในรูปแบบ YUV เป็น RGB, จัดการเรื่องสิทธิ์ Permission ในการเข้าถึงกล้อง, สิทธิ์เข้าถึง Storage, จัดการการหมุนหน้าจอ, etc.
TensorFlow Lite on Android Code Example
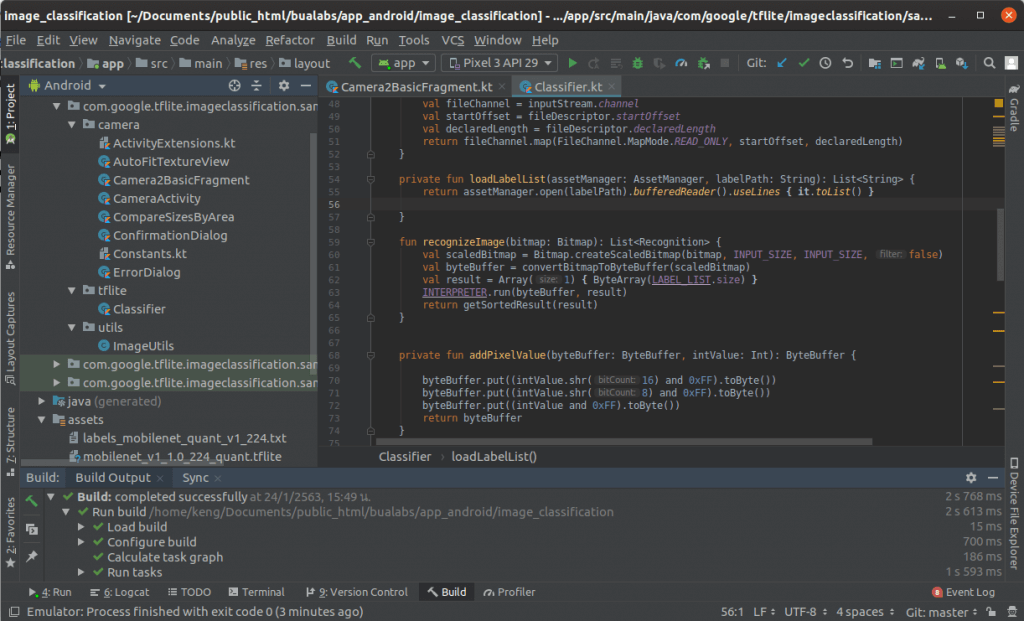
นอกจาก build.gradle และ AndroidManifest.xml โค้ดตัวอย่างจะประกอบด้วย 3 ไฟล์ คือ Classifier.kt เป็น Class จัดการโมเดล, ImageUtils.java จัดการกล้องและรูปภาพ และ Camera2BasicFragment.kt เป็น UI
build.gradle
ใน Build Script เราจะกำหนดค่าสำหรับ dependencies ไปยัง org.tensorflow:tensorflow-lite:0.0.0-nightly และ กำหนด aaptOptions ให้ไม่ต้องบีบอัดไฟล์ FlatBuffer นามสกุล tflite, lite ซึ่งเก็บโมเดล TensorFlow Lite
android {
    ...
    aaptOptions {
        noCompress "tflite"
        noCompress "lite"
    }
}
dependencies {
    implementation 'org.tensorflow:tensorflow-lite:0.0.0-nightly'
}
AndroidManifest.xml
ใน Manifest จะขอสิทธิ์การเข้าถึงกล้อง และ Storage
    <uses-permission android:name="android.permission.CAMERA" />
    <uses-permission android:name="android.permission.WRITE_EXTERNAL_STORAGE" />
Classifier.kt
คล้ายกับใน ep ที่แล้ว tflite ep.5 แต่จะเปลี่ยนมาใช้โมเดลที่ Pre-trained แล้ว และทำ Quantization มาเรียบร้อยแทนแล้ว
    private val mModelPath = "mobilenet_v1_1.0_224_quant.tflite"
    private val mLabelPath = "labels_mobilenet_quant_v1_224.txt"
ImageUtils.java
ประกาศฟังก์ชันแปลง YUV420 จากกล้อง ไปเป็น ARGB8888
    public static void convertYUV420ToARGB8888(
            byte[] yData,
            byte[] uData,
            byte[] vData,
            int width,
            int height,
            int yRowStride,
            int uvRowStride,
            int uvPixelStride,
            int[] out) {
        int yp = 0;
        for (int j = 0; j < height; j++) {
            int pY = yRowStride * j;
            int pUV = uvRowStride * (j >> 1);

            for (int i = 0; i < width; i++) {
                int uv_offset = pUV + (i >> 1) * uvPixelStride;

                out[yp++] = YUV2RGB(0xff & yData[pY + i], 0xff & uData[uv_offset], 0xff & vData[uv_offset]);
            }
        }
    }
เข้าสูตรแปลงทีละ Pixel
    private static int YUV2RGB(int y, int u, int v) {
        // Adjust and check YUV values
        y = (y - 16) < 0 ? 0 : (y - 16);
        u -= 128;
        v -= 128;

        // This is the floating point equivalent. We do the conversion in integer
        // because some Android devices do not have floating point in hardware.
        // nR = (int)(1.164 * nY + 2.018 * nU);
        // nG = (int)(1.164 * nY - 0.813 * nV - 0.391 * nU);
        // nB = (int)(1.164 * nY + 1.596 * nV);
        int y1192 = 1192 * y;
        int r = (y1192 + 1634 * v);
        int g = (y1192 - 833 * v - 400 * u);
        int b = (y1192 + 2066 * u);

        // Clipping RGB values to be inside boundaries [ 0 , kMaxChannelValue ]
        r = r > kMaxChannelValue ? kMaxChannelValue : (r < 0 ? 0 : r);
        g = g > kMaxChannelValue ? kMaxChannelValue : (g < 0 ? 0 : g);
        b = b > kMaxChannelValue ? kMaxChannelValue : (b < 0 ? 0 : b);

        return 0xff000000 | ((r << 6) & 0xff0000) | ((g >> 2) & 0xff00) | ((b >> 10) & 0xff);
    }
Camera2BasicFragment.kt
Bind Event กล้องเข้ากับฟังก์ชัน ให้เรียกฟังก์ชันทุกครั้งที่มีการเปลี่ยนแปลง มีภาพใหม่
    private val onImageAvailableListener = ImageReader.OnImageAvailableListener {
        ....
    }
ดึงข้อมูลภาพ จากกล้อง ในรูปแบบ YUV
        val image: Image = it?.acquireLatestImage()!!
        val planes = image!!.getPlanes()

        fillBytes(planes, yuvBytes)
        yRowStride = planes[0].getRowStride()
        val uvRowStride = planes[1].getRowStride()
        val uvPixelStride = planes[1].getPixelStride()
ส่งไปให้ ImageUtils แปลงเป็น RGB พร้อมแสดงบนหน้าจอ App
        imageConverter = Runnable {
            ImageUtils.convertYUV420ToARGB8888(
                    yuvBytes[0],
                    yuvBytes[1],
                    yuvBytes[2],
                    previewSize.width,
                    previewSize.height,
                    yRowStride,
                    uvRowStride,
                    uvPixelStride,
                    rgbBytes
            )
        }

        rgbFrameBitmap?.setPixels(
                getRgbBytes(), 0, previewSize.width, 0, 0, previewSize.width,
                previewSize.height
        )
นำข้อมูลรูปที่แปลงเป็น RGB เรียบร้อยแล้ว ส่งไปให้โมเดล predict แล้วนำผลลัพธ์แสดงบนหน้าจอ
        var results = rgbFrameBitmap?.let { it1 -> classifier.recognizeImage(it1) };
        activity?.runOnUiThread({
            itemNameTextView.setText(results?.get(0)?.title)
            confidenceTextView.setText(String.format("%.2f",(results?.get(0)?.confidence?.times(100)))+"%");
        })
เรามาเริ่มกันเลยดีกว่า
Build
Compile และ Build Project
Run on Android Emulator
Deploy บน Android Emulator
Credit
- https://www.coursera.org/learn/device-based-models-tensorflow/
- https://www.tensorflow.org/lite/guide/android
- https://developer.android.com/reference/android/hardware/camera2/package-summary
- https://www.tensorflow.org/lite/models
- https://en.wikipedia.org/wiki/YUV