ใน ep นี้ เราจะสอน ขั้นตอนการสร้างแอพพลิเคชั่น AI ที่มีความสามารถ ตรวจจับวัตถุ Object Detection ด้วย TensorFlow Lite โดยใช้โมเดล MobileNet SSD ซึ่งถูก Pre-trained และ Convert ไว้เรียบร้อยแล้ว มาประกอบเป็น App สำหรับรันบนมือถือ Android ด้วยภาษา Kotlin
สอนเขียน App มือถือ AI ตรวจจับวัตถุ บน Android
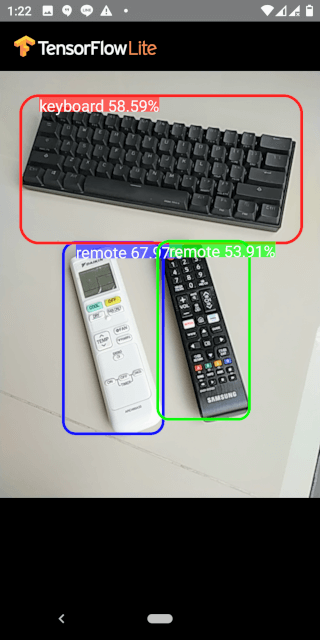
เราสามารถพัฒนา App บนมือถือ Android ให้มีความสามารถด้าน AI / Machine Learning มีฟังก์ชันตรวจจับวัตถุ Object Detection จากรูป ที่ถ่ายจากกล้องมือถือ แบบ Real-time ด้วยโมเดล MobileNet SSD ที่เทรนกับ COCO Dataset ที่สามารถตรวจจับวัตถุพร้อมกัน 10 วัตถุ ใน 80 Class
App ได้ predict โดยล้อมกรอบสีรอบวัตถุ ระบุว่าเป็น Object ชนิดไหน และ แสดงตัวเลขความน่าจะเป็น พร้อมกันหลายวัตถุ App ทำงาน Out of the box โดยที่เราไม่ได้ทำ Transfer Learning ใด ๆ เลย ดังตัวอย่างด้านล่าง
ในเคสนี้ เราจะใช้รูปภาพกล้องมือถือ ทำให้โค้ดซับซ้อนยิ่งขึ้น เนื่องจากต้องจัดการเรื่องต่าง ๆ เพิ่มเติม ดังใน ep ที่แล้ว tflite ep.6
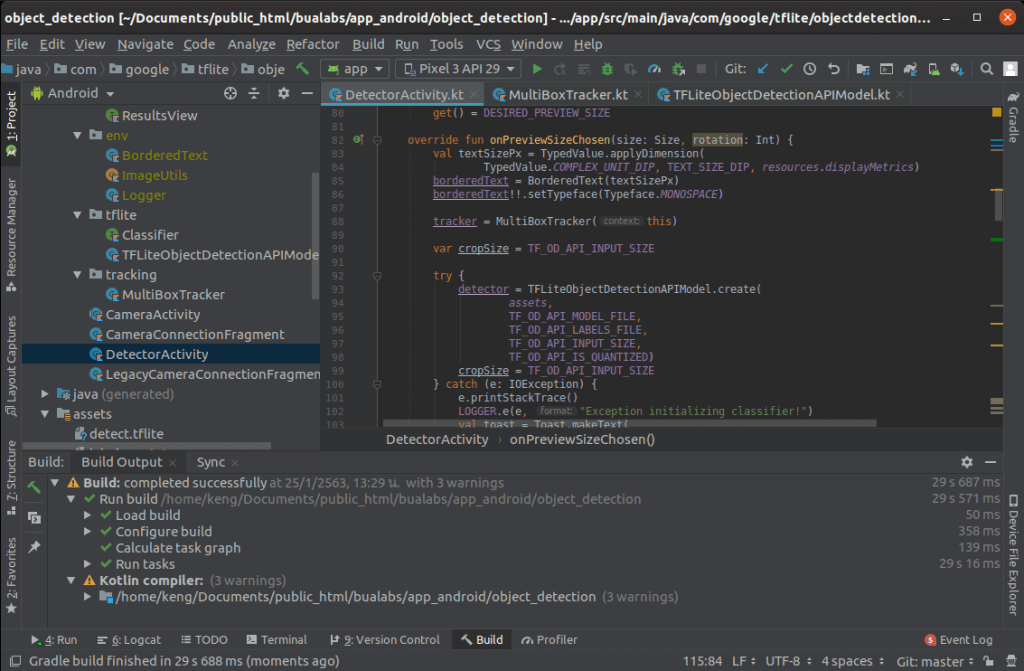
TensorFlow Lite on Android Code Example
นอกจาก build.gradle และ AndroidManifest.xml โค้ดตัวอย่างจะประกอบด้วย หลายไฟล์ แต่ไฟล์หลักมี 3 ไฟล์ คือ TFLiteObjectDetectionAPIModel.kt จัดการเครื่องโมเดลตรวจจับวัตถุ Object Detection, MultiBoxTracker.kt จัดการเรื่อง Track วัตถุ สร้างกรอบ แสดงผลบนหน้าจอ, และ DetectorActivity.kt เป็นโคัดหลักของ App
build.gradle
ใน Build Script เราจะกำหนดค่าสำหรับ dependencies ไปยัง org.tensorflow:tensorflow-lite:0.0.0-nightly และ กำหนด aaptOptions ให้ไม่ต้องบีบอัดไฟล์ FlatBuffer นามสกุล tflite, lite ซึ่งเก็บโมเดล TensorFlow Lite
android {
    ...
    aaptOptions {
        noCompress "tflite"
        noCompress "lite"
    }
}
dependencies {
    implementation 'org.tensorflow:tensorflow-lite:0.0.0-nightly'
}
AndroidManifest.xml
ใน Manifest จะขอสิทธิ์การเข้าถึงกล้อง และ Storage
    <uses-permission android:name="android.permission.CAMERA" />
    <uses-permission android:name="android.permission.WRITE_EXTERNAL_STORAGE" />
TFLiteObjectDetectionAPIModel.kt
โหลดไฟล์โมเดล และ ไฟล์ Label
    val d = TFLiteObjectDetectionAPIModel()
    labelsInput = assetManager.open(actualFilename)
สร้าง Intepreter จากโมเดล FlatBuffer ไฟล์ tflite
    val options = Interpreter.Options()
    d.tfLite = Interpreter(loadModelFile(assetManager, modelFilename), options)
เตรียมโครงสร้างข้อมูล ที่จะรับ Output จากโมเดล ดังนี้
| Index | Description |
| 0 | Bounding Boxes |
| 1 | Classes |
| 2 | Scores |
| 3 | Number of Results |
multiple classifications each with confidence scores and bounding boxes so
our output tensors will look like this.
    d.outputLocations = Array(1) { Array(NUM_DETECTIONS) { FloatArray(4) } }
    d.outputClasses = Array(1) { FloatArray(NUM_DETECTIONS) }
    d.outputScores = Array(1) { FloatArray(NUM_DETECTIONS) }
    d.numDetections = FloatArray(1)
ประกาศฟังก์ชัน recognizeImage จับภาพจากกล้อง ส่งให้โมเดลตรวจจับวัตถุ แล้วนำผลลัพธ์ที่ได้มาแสดงผลบนหน้าจอ เป็นกรอบ พร้อมข้อความ
    override fun recognizeImage(bitmap: Bitmap): List<Classifier.Recognition> {
        bitmap.getPixels(intValues, 0, bitmap.width, 0, 0, bitmap.width, bitmap.height)

        tfLite!!.runForMultipleInputsOutputs(inputArray, outputMap)

        val recognitions = ArrayList<Classifier.Recognition>(NUM_DETECTIONS)
        recognitions.add(
                Classifier.Recognition(
                        "" + i,
                        labels[outputClasses!![0][i].toInt() + labelOffset],
                        outputScores!![0][i],
                        detection))
    }
MultiBoxTracker.kt
กำหนดสีสัน และขนาดที่จะแสดงกรอบ และข้อความ
        boxPaint.color = Color.RED
        boxPaint.style = Style.STROKE
        boxPaint.strokeWidth = 10.0f
        boxPaint.strokeCap = Cap.ROUND
        boxPaint.strokeJoin = Join.ROUND
        boxPaint.strokeMiter = 100f
ฟังก์ชัน processResults สำหรับคำนวนกรอบ Output ที่ได้มาจากโมเดล บนหน้าจอ App
    private fun processResults(results: List<Recognition>) {
        for (result in results) {
            val detectionScreenRect = RectF()
            rgbFrameToScreen.mapRect(detectionScreenRect, detectionFrameRect)
            screenRects.add(Pair(result.confidence, detectionScreenRect))
            rectsToTrack.add(Pair(result.confidence, result))
        }
    }
DetectorActivity.kt
คล้ายกับใน ep ที่แล้ว tflite ep.5 แต่จะเปลี่ยนมาใช้โมเดลที่ Pre-trained แล้ว และทำ Quantization มาเรียบร้อยแทนแล้ว
        private val TF_OD_API_INPUT_SIZE = 300
        private val TF_OD_API_IS_QUANTIZED = true
        private val TF_OD_API_MODEL_FILE = "detect.tflite"
        private val TF_OD_API_LABELS_FILE = "file:///android_asset/labelmap.txt"
โค้ดหลักของ App ดึงรูปจากกล้อง แสดงบนหน้าจอ App พร้อมส่งไปให้โมเดล ทำ Object Detection แล้วนำผลลัพธ์มาแสดงผล กรอบสีพร้อมข้อความ
    rgbFrameBitmap!!.setPixels(getRgbBytes(), 0, previewWidth, 0, 0, previewWidth, previewHeight)

    val results = detector!!.recognizeImage(croppedBitmap!!)
    tracker!!.trackResults(mappedRecognitions, currTimestamp)
เรามาเริ่มกันเลยดีกว่า
TFLiteObjectDetectionAPIModel.kt
Build
Compile และ Build Project
Run on Android Mobile Phone
Deploy บน มือถือ Android

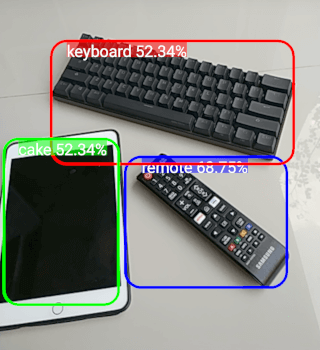
เนื่องจากใน COCO Dataset ไม่มี iPad, โมเดลก็จะ Predict อะไรแปลก ๆ ออกมา
Credit
- https://www.coursera.org/learn/device-based-models-tensorflow/
- https://www.tensorflow.org/lite/guide/android
- https://developer.android.com/reference/android/hardware/camera2/package-summary
- https://www.tensorflow.org/lite/models
- http://cocodataset.org/#home